How to use custom HTML email templates with Customer.io

Congratulations! You’ve just downloaded your set of responsive HTML email templates and are ready to start sending professional looking emails from your ESP (Email Service Provider). Now you need to put them into Customer.io so you can use them.
Customer.io is a great messaging platform and includes features for automating and segmenting users, so you can send emails at the right time to the right people.
With Customer.io you can add a custom email template to use for all your emails.
How to use custom email templates for Customer.io messaging
- Open your Customer.io dashboard
- Go to
Email Layouts - Create a new layout and give it a memorable name
- Copy the code across from the inlined email template you want to use
- Update the content to include Customer.io content tag
- Update the unsubscribe link to include Customer.io unsubscribe tag
- Remove preheader text
- Save
- Select this layout when setting up messages
Lets look at some of these in more detail.
Copy the code across
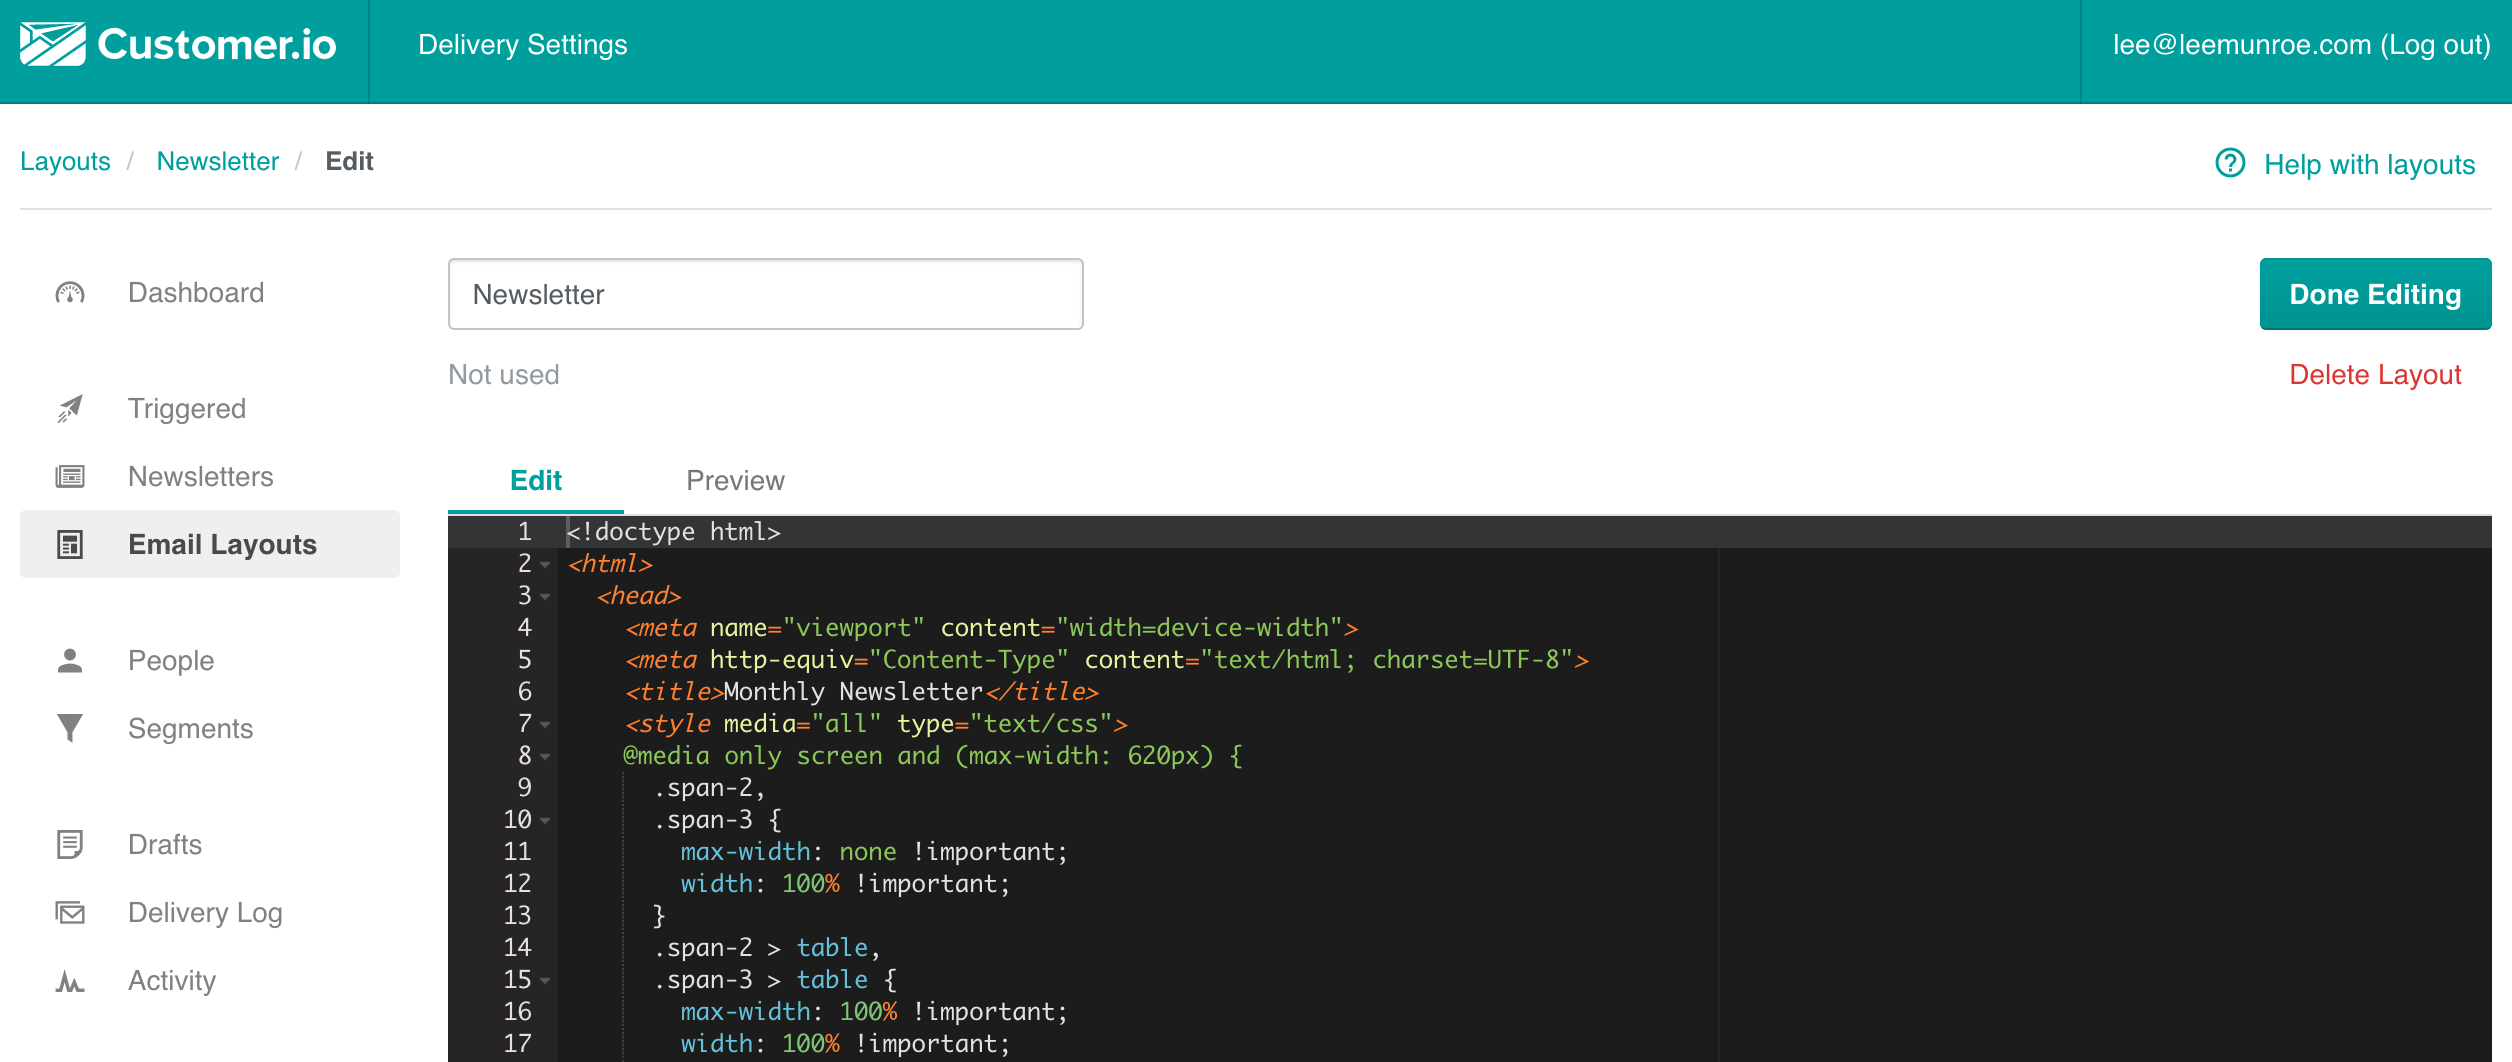
Open your email template in your editor of choice so you can see the code. Select all, copy, then paste into Customer.io. Here I’ve copied across the inlined newsletter code.

At this point the template is using the default HTMLemail.io imagery and branding so remember to switch the logo out for your own logo.
Update the content to include Customer.io tags
So that you can use this template, Customer.io needs to know what parts are editable, and where the unsubscribe link should go.
Replace the current content with the {{ content }} tag like so:
<!-- START MAIN CONTENT AREA -->
<tr>
  <td class="wrapper" style="font-family: sans-serif; font-size: 14px; vertical-align: top; box-sizing: border-box; padding: 20px;" valign="top">
  {{ content }}
  </td>
</tr>
<!-- END MAIN CONTENT AREA -->
Then add the unsubscribe url to the unsubscribe link.
Don't like these emails? <a href="{{ unsubscribe_url }}" style="text-decoration: underline; color: #999999; font-size: 12px; text-align: center;">Unsubscribe</a>
Remove preheader text
Customer.io doesn’t currently have a feature for supporting preheader text, so you’re safest to remove this so you don’t forget about it i.e. remove this HTML from your template
<span class="preheader" style="color: transparent; display: none; height: 0; max-height: 0; max-width: 0; opacity: 0; overflow: hidden; mso-hide: all; visibility: hidden; width: 0;">This is preheader text. Some clients will show this text as a preview.</span>
Using images
If you’re using images in the template, like your company logo or the social icons, you should upload these to Imgur or CloudApp. Images that are part of your content you’ll be able to upload when creating your message.
Start sending
That should be you ready to go. When you create an auto message or a newsletter, you can select your new layout and use it.

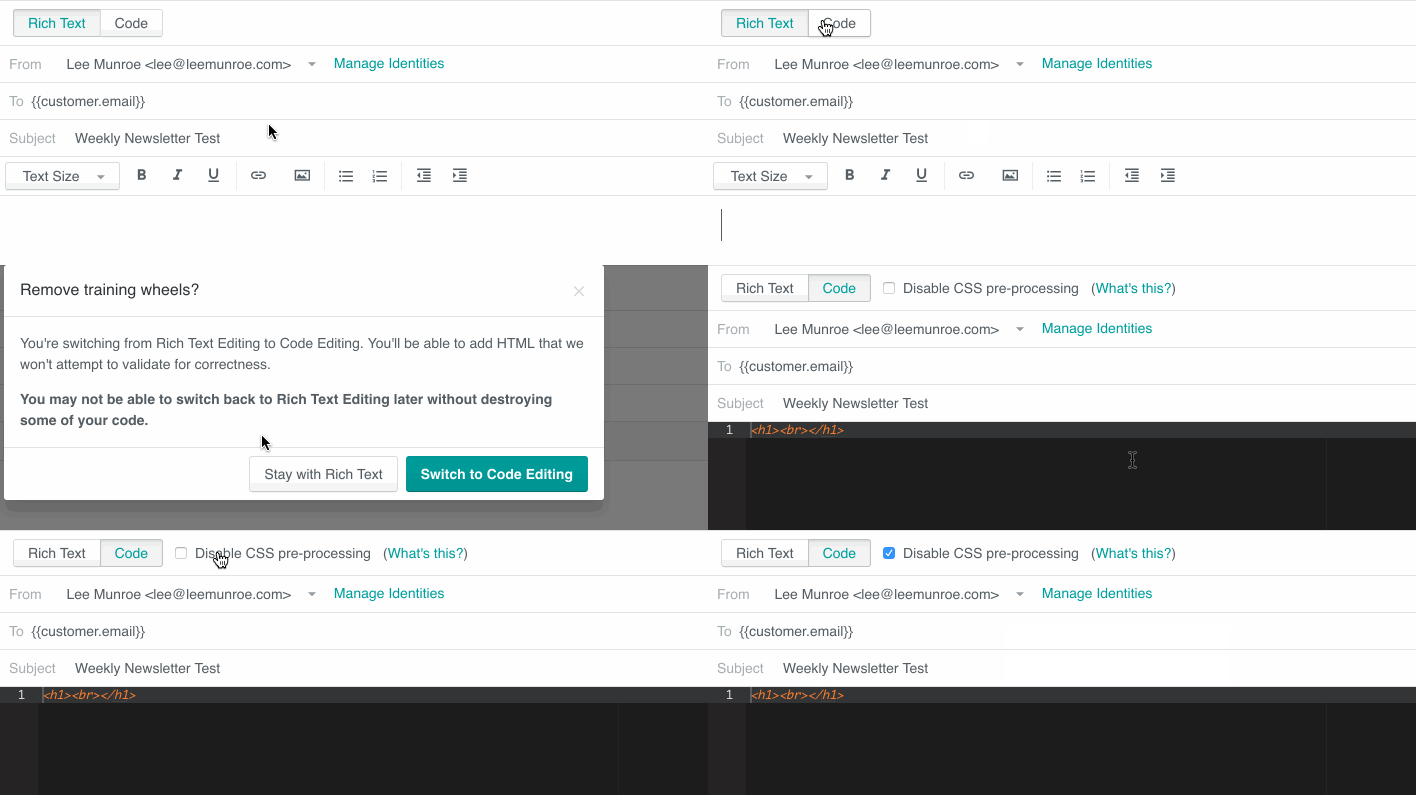
I recommend disabling CSS pre-processing if you are using the templates that are already inlined. It’s possible that without disabling it may cause issues, especially with responsive media queries.
To disable, switch from Rich Text to Code mode. You should see a checkbox for Disable CSS pre-processing. Check this.

Further reading
Other email service template tutorials
Receive email design content like this to your inbox.
No spam. Just related email content.


