How to use custom HTML email templates with MailerLite

The following is a guest post by Mailerlite’s Ilma Nausedaite.
MailerLite is an email marketing service provider with a focus on simplicity, excellent customer support and beautiful pre-built designs.
MailerLite helps customers create professional email campaigns with a powerful yet easy-to-use content editor, subscriber management tools and campaign reports highlighting the most important metrics.
Importing Your Template
MailerLite offers 3 design editors to use for email marketing:
- Drag & Drop Editor
- Rich Text Editor
- HTML Editor
For importing and editing custom templates, you will be using the HTML editor. There are several ways you can import your template in MailerLite.
- Import from URL - create a campaign by importing the HTML code directly from a hosted URL.
- Paste in code - create a campaign by pasting your custom coded design.
- Import from ZIP - create a campaign by uploading a zip file that contains the HTML code.
Let’s choose Import from ZIP. It’s very convenient for including the CSS and image assets. Furthermore, all images imported from Zip or URL will be automatically saved in the File Manager.
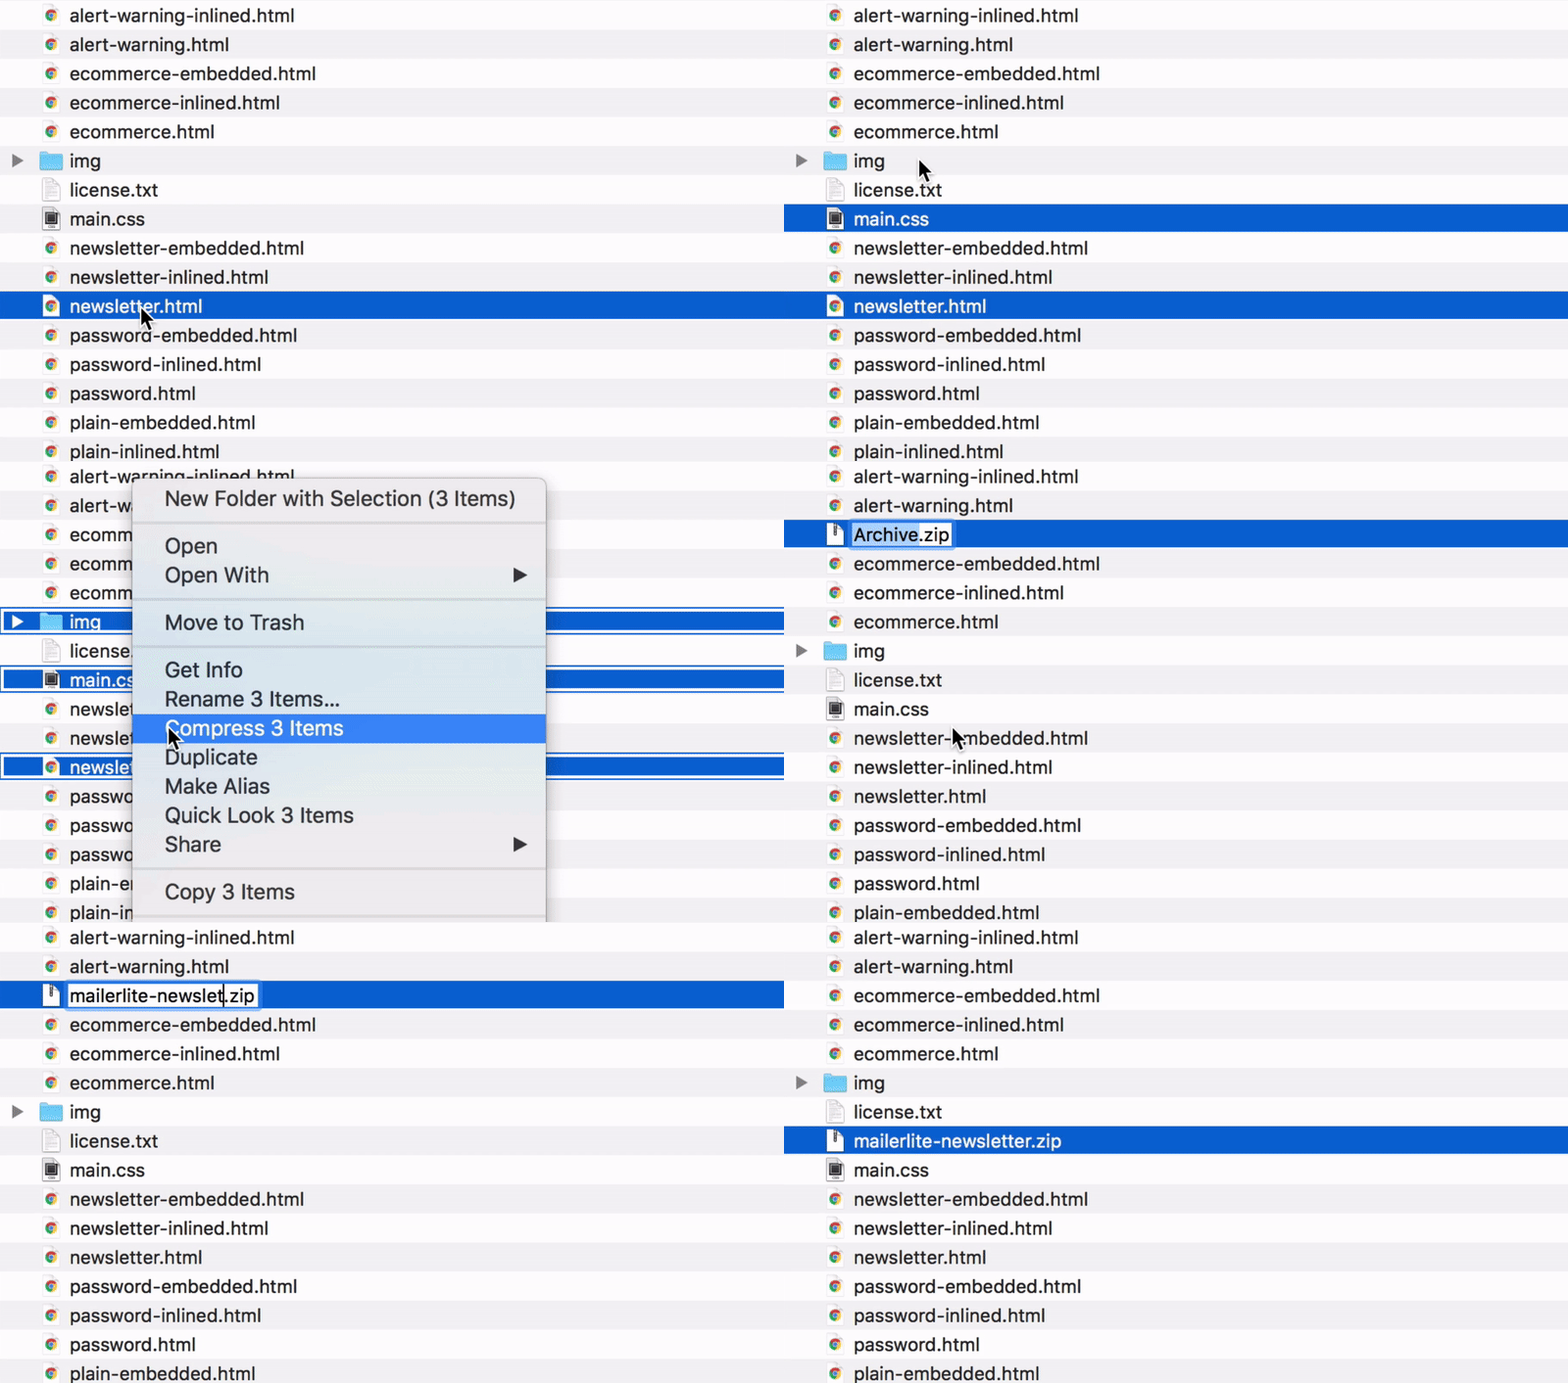
Before we start, let’s zip up the template(s) you want to use.
- Select the files you want to zip, which should include:
- Non-inlined HTML template e.g.
newsletter.html main.cssstylesheet/imgdirectory
- Non-inlined HTML template e.g.
- Compress or zip these files into one zip file.
- Rename the file so you know what it is.

How To Use A Custom Template In A Campaign
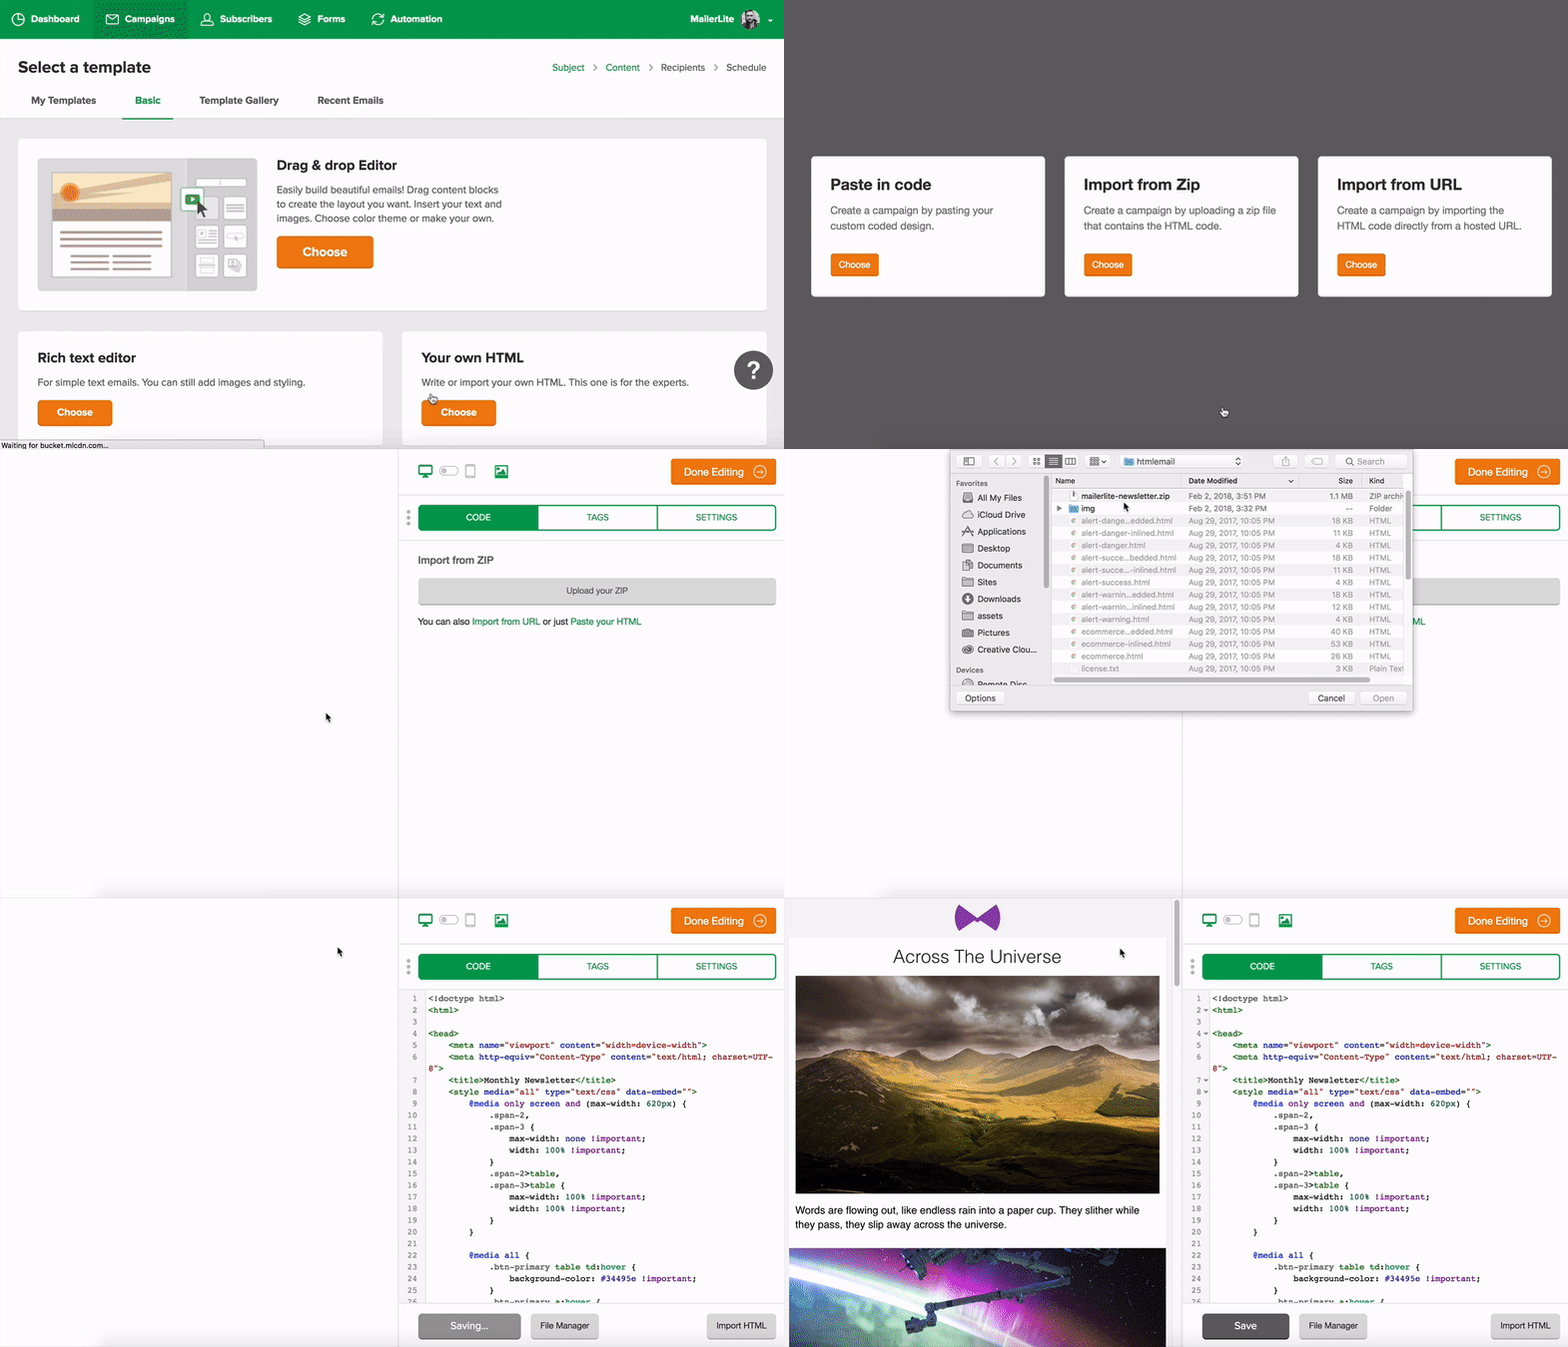
1. Create A New Campaign
- Open your MailerLite dashboard
- Go to
Campaigns>Create Campaign - Select the type of campaign to send e.g.
Regular Campaign - Enter your campaign information
2. Upload Your Email Template
When asked to select an editor:
- Choose
Your own HTML>Import from zip - Select your zip file that includes the template
- Wait for it to upload

3. Edit Your Template
Now you can make changes to your template. In the Code tab you can edit the content within your template — change headings, preheader, body text, links and images. The changes you make in HTML code can be immediately seen on the preview on your left hand side.
In the Tags tab you’ll find a list of merge tags that you can use to personalize your emails.
Use the Settings tab to automatically add a footer to the bottom of your email with an unsubscribe link, and any other elements that are required to comply with CAN Spam laws.
Note that some email clients strip out CSS in <style> blocks. Using Automatic CSS Inliner will apply all of your CSS (except media queries) as inline styles.
Another cool feature is the option to toggle images On/Off to preview ALT text and optimize your email for image blocking. MailerLite offers a File Manager feature allowing you to upload your template images and reference them. MailerLite handles the hosting so you never need to worry about an external CDN.
Finally, you can click the mobile icon to see how your template will look on mobile devices.
4. Send Your Campaign
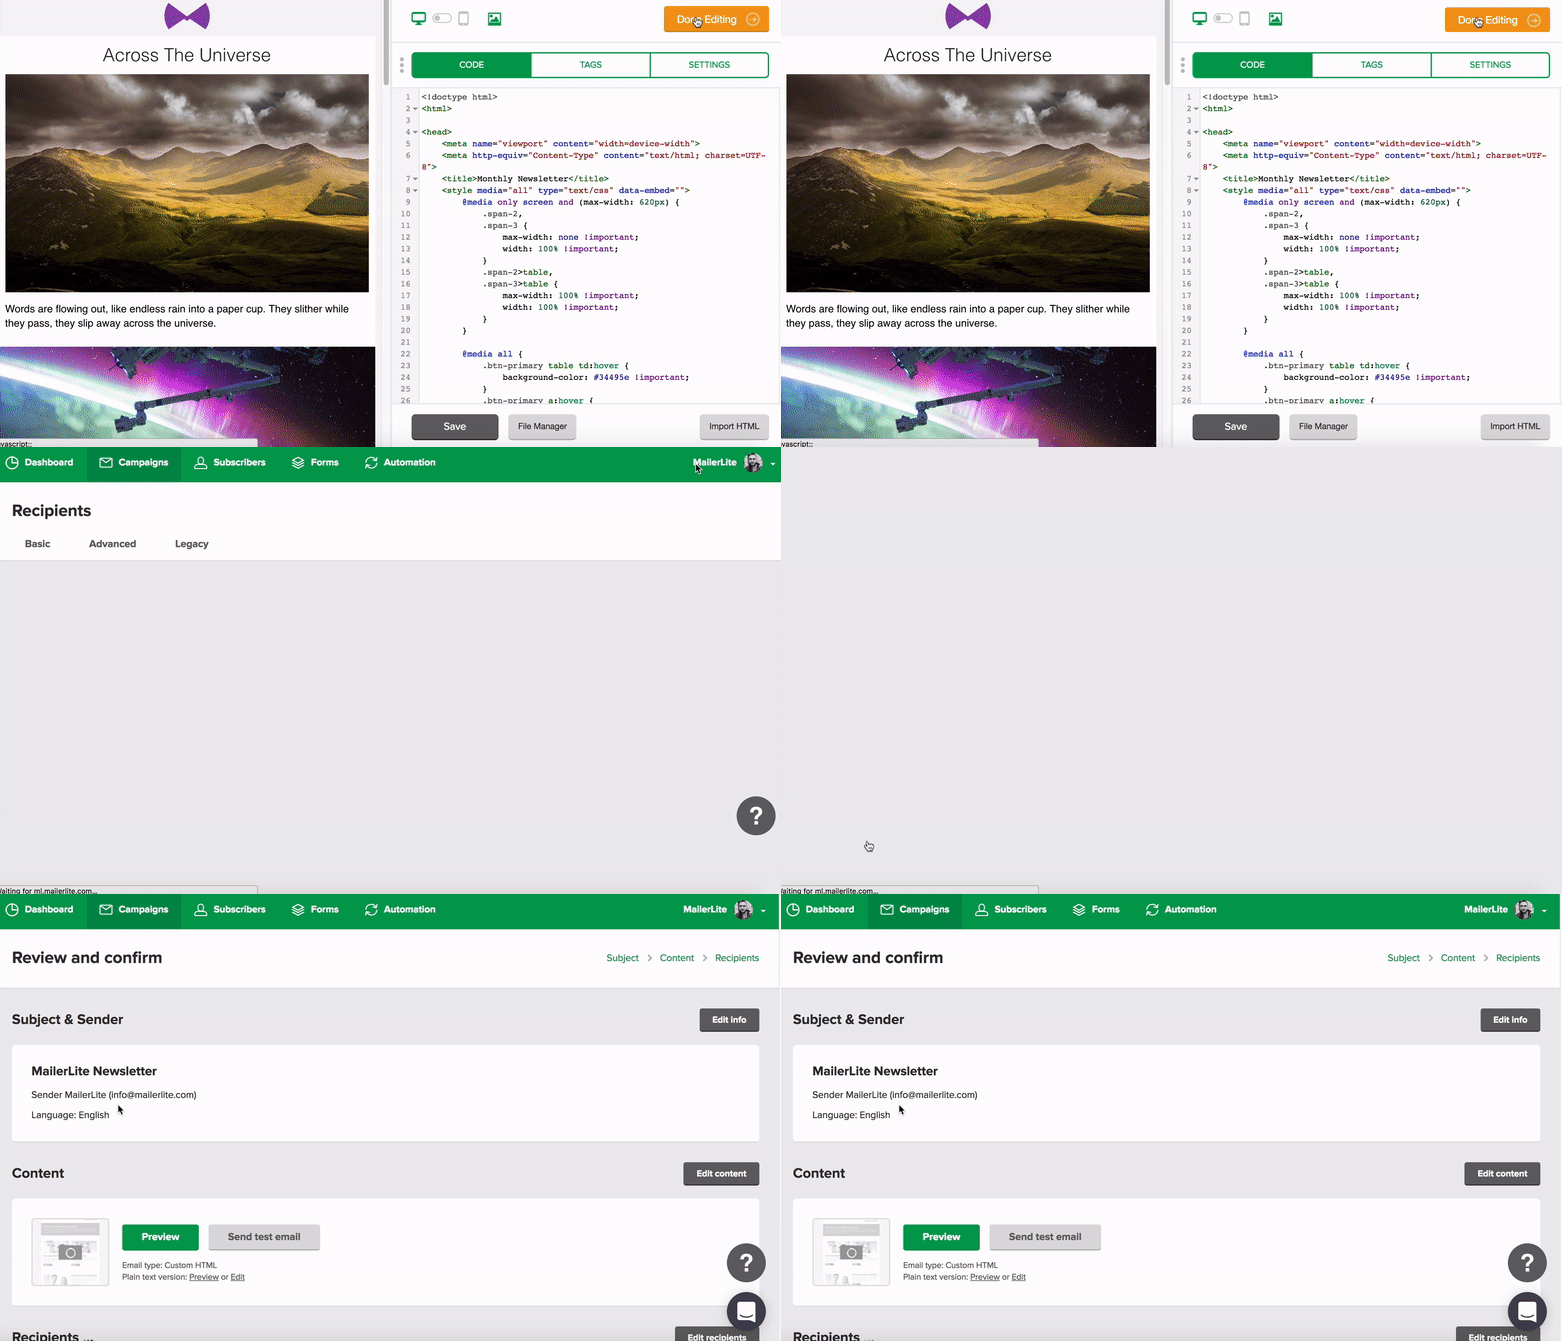
MailerLite’s HTML code editor saves your changes automatically. You can also save changes manually with a keyboard shortcut (CMD+S for Macs, CTRL+S for Windows) or just by clicking Save button.
Once you’re happy with your changes, click Done Editing button. You will then see the Recipients window where you can select your audience.
Click Review and Confirm once selected. Before you launch your campaign, send a test email to yourself and check how it looks. If everything is great, click Schedule button to schedule and send it.

Further reading
Other email service template tutorials
Receive email design content like this to your inbox.
No spam. Just related email content.


