How to use custom HTML email templates with Postmark

The following is a guest post by Postmark’s Patrick Graham.
Now that you have your high-quality transactional email templates from HTML Email, it’s time to start sending them with the stellar sender reputation they deserve. Use Postmark to send your HTML Email templates and rest assured your important transactional emails will reach the inbox.
Postmark includes important features such as best-in-class deliverability, fast time to inbox, open and click tracking, a well documented and developer-friendly REST API, webhooks, and a responsive, helpful support team.
In this article we will cover how to import your HTML Email templates into Postmark and send them using the Postmark API.
Import your HTML Email template into Postmark
- Copy the HTML from the inline version of the HTML Email template you want to use with Postmark.
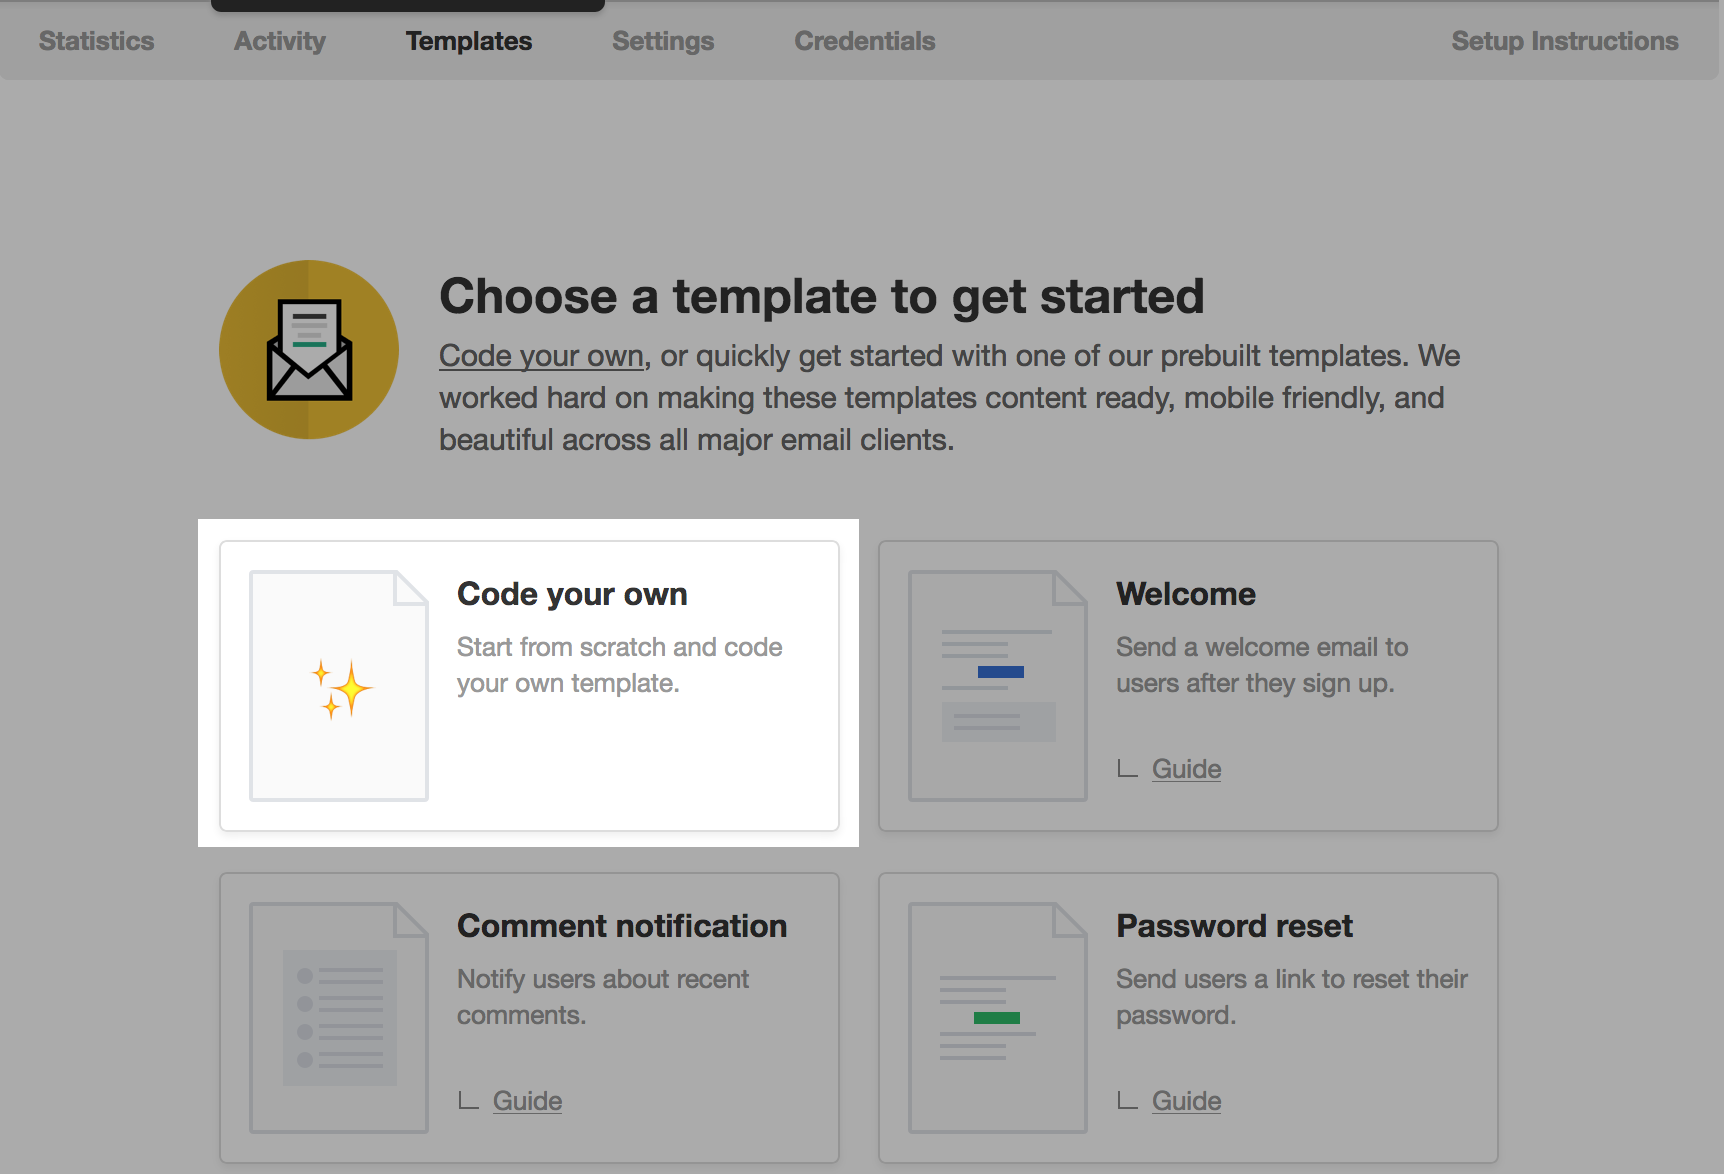
- Head into the Templates area of your server in Postmark.
- Click the Add Template button and then choose the Code your own option. You will be taken straight to the page below if this will be the Postmark server’s first template.
Set up the template variables for variable interpolation
Postmark templates use Mustachio for the syntax, which is similar to Mustache.js but with some added features for templates. You can place variables for interpolation in a Postmark template using this format:
{{ my_variable_name }}
You can also use dot notation {{ object.property }} for accessing object properties, which is useful if you have nested JSON objects in your template model. If you have a template model like this (represented as JSON):
{
    "person" : {
       "first_name" : "John"
    }
}
And this in your Postmark template:
<i>Hello {{ person.first_name }}</i>
Mustachio will produce this content in the rendered email:
Hello John
Anywhere in the HTML Email template where you want to be able to dynamically populate the content, you will need to place a Mustachio variable using the format above. Spend some time going over the imported HTML Email template content and replace plain text with Mustachio variables wherever you need the rendered content to be dynamically populated.
In this example below, I have updated the Welcome Email template’s HTML with the Postmark template editor to include Mustachio variables for the company name and name of the recipient:
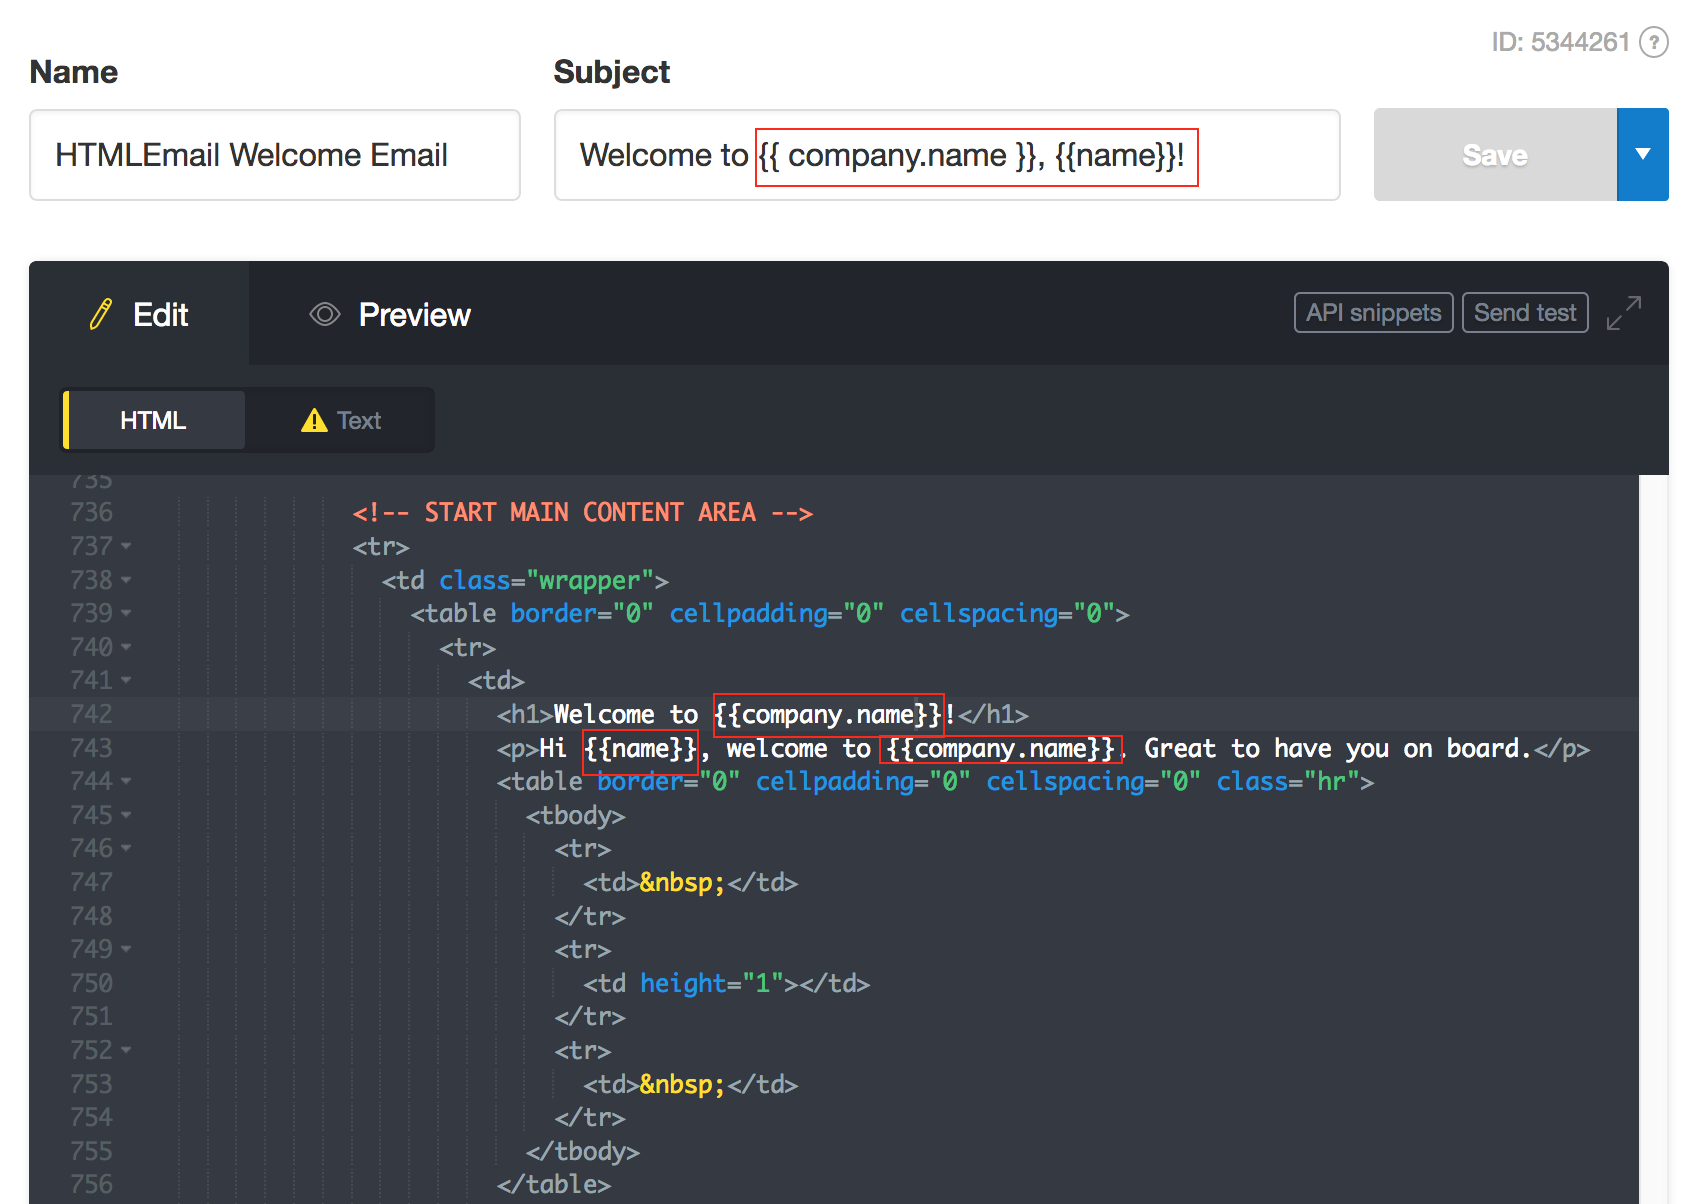
This way I can populate the company name and name of the recipient dynamically at the time of sending, using the template model in my send request.
How template variables get populated with real data in the rendered email
While you’ll likely end up using one of our libraries for sending with our API (those options will be discussed later on), first let’s take a look at some example raw JSON for sending an email with Postmark using a template, so you get a solid understanding of how template variables are interpolated with their final content.
{
  "TemplateId": 1234,
  "TemplateModel": {
    "name": "John Smith",
    "company": {
      "name": "ACME, Inc."
    }
  },
  "From": "sender@example.com",
  "To": "receiver@example.com",
  "Cc": null,
  "Bcc": null,
  "Tag": "welcome"
}
The TemplateId field is used for telling Postmark what template is being used. Each template you create will have a unique ID that you will need to use for this field to send using that template. If you are using template aliases in the template, you can use the TemplateAlias field to reference the template you want to use, instead of the TemplateId.
The TemplateModel field is where the magic of populating variables with content happens. This field is where you will need to populate your template variables with actual data that will eventually be rendered in the the email the recipient sees.
Using the above example, the "name":"John Smith" key/value pair is telling Postmark to populate the {{ user_name }} variable in the Template. Each variable you place in your Template can be populated in this TemplateModel field you use in your API call to Postmark to send an email using a Template.
Tip: Since Postmark does not support sending bulk email to subscribers or managing lists, you will want to remove the unsubscribe links in the footers from the HTML Email templates when importing them into Postmark.
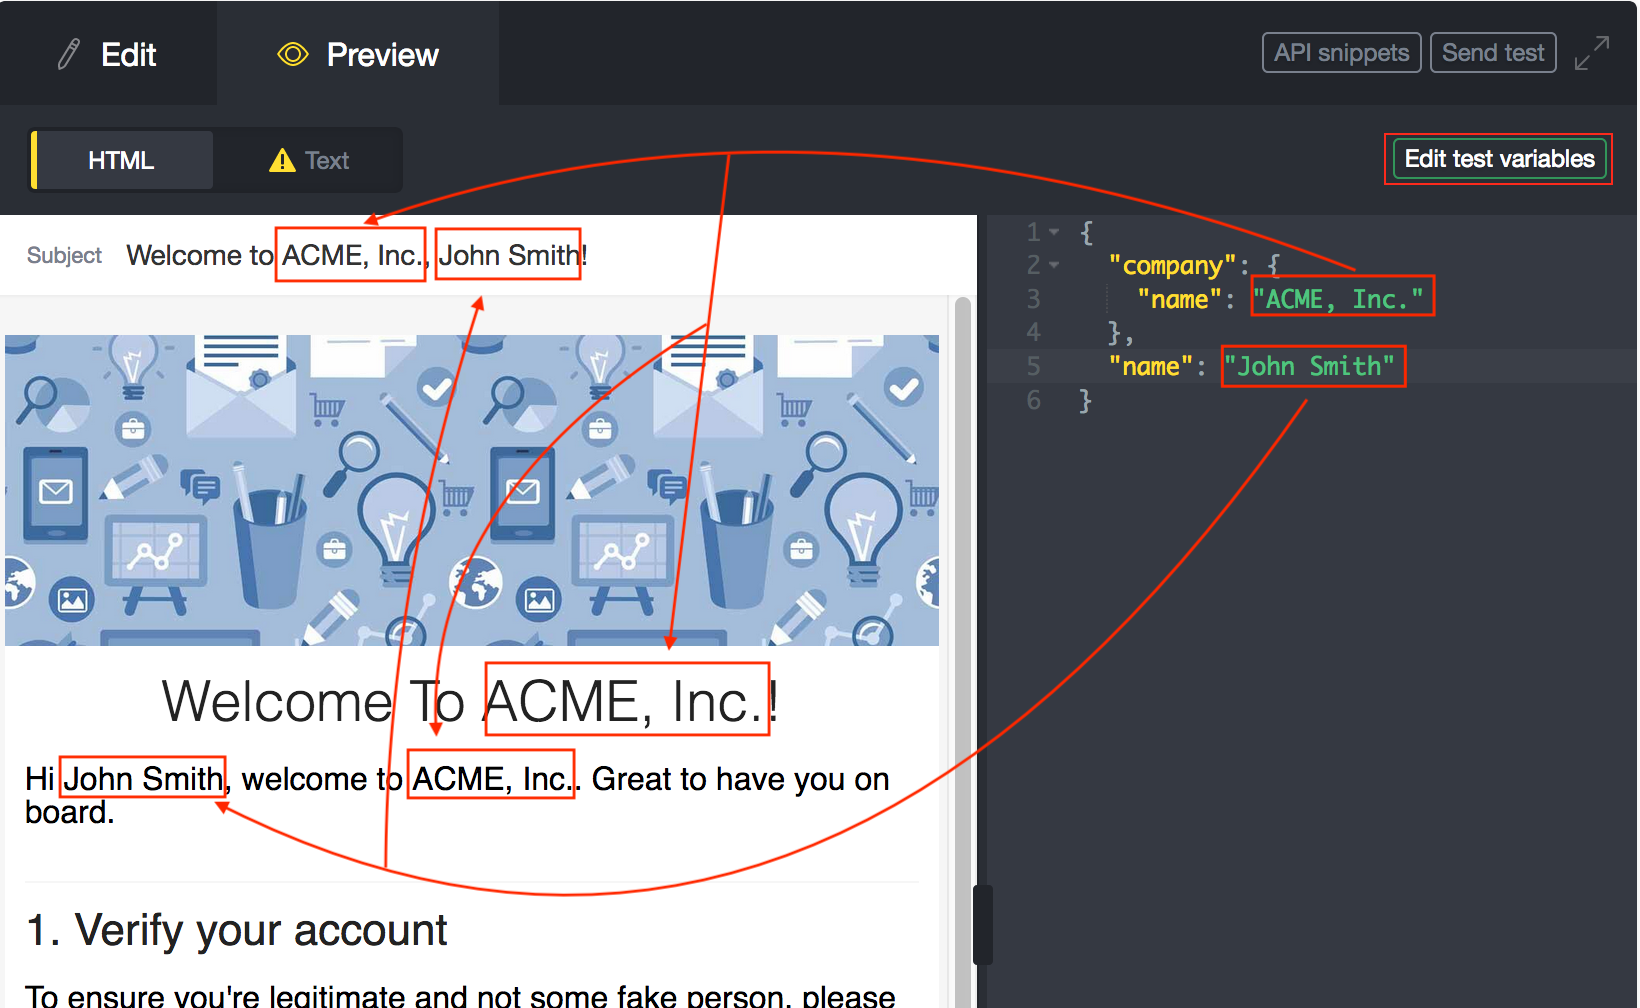
Using our example welcome email Template from above you can see where the variables are replaced with data from the template model:

The template model information was rendered where Mustachio variables were used in the template.
Note: Since Postmark does not host assets, including images, you will want to host them somewhere with a hosting service, such as Amazon S3. You can then reference the images by url in the <img> tags, throughout the template.
Send an email using the template
There are several ways to send out some test emails using your template before you move to production and send with them to real recipients. Pick the option that is best for you and start sending some tests with your template to see how it renders it different email clients.
- Use the Postmark UI - You can send test emails with a template directly from the UI. This is a quick and easy way to test the template if you do not need to add cc or bcc recipients, control link tracking, or adjust other settings that you can control when you send using our API.
- Use a curl command - If you are comfortable with using terminal or command prompt and curl, you can copy a curl snippet to test the template with. This also gives you the option of adjusting tracking settings, adding cc or bcc recipients, and controlling whether we inline the CSS or not.
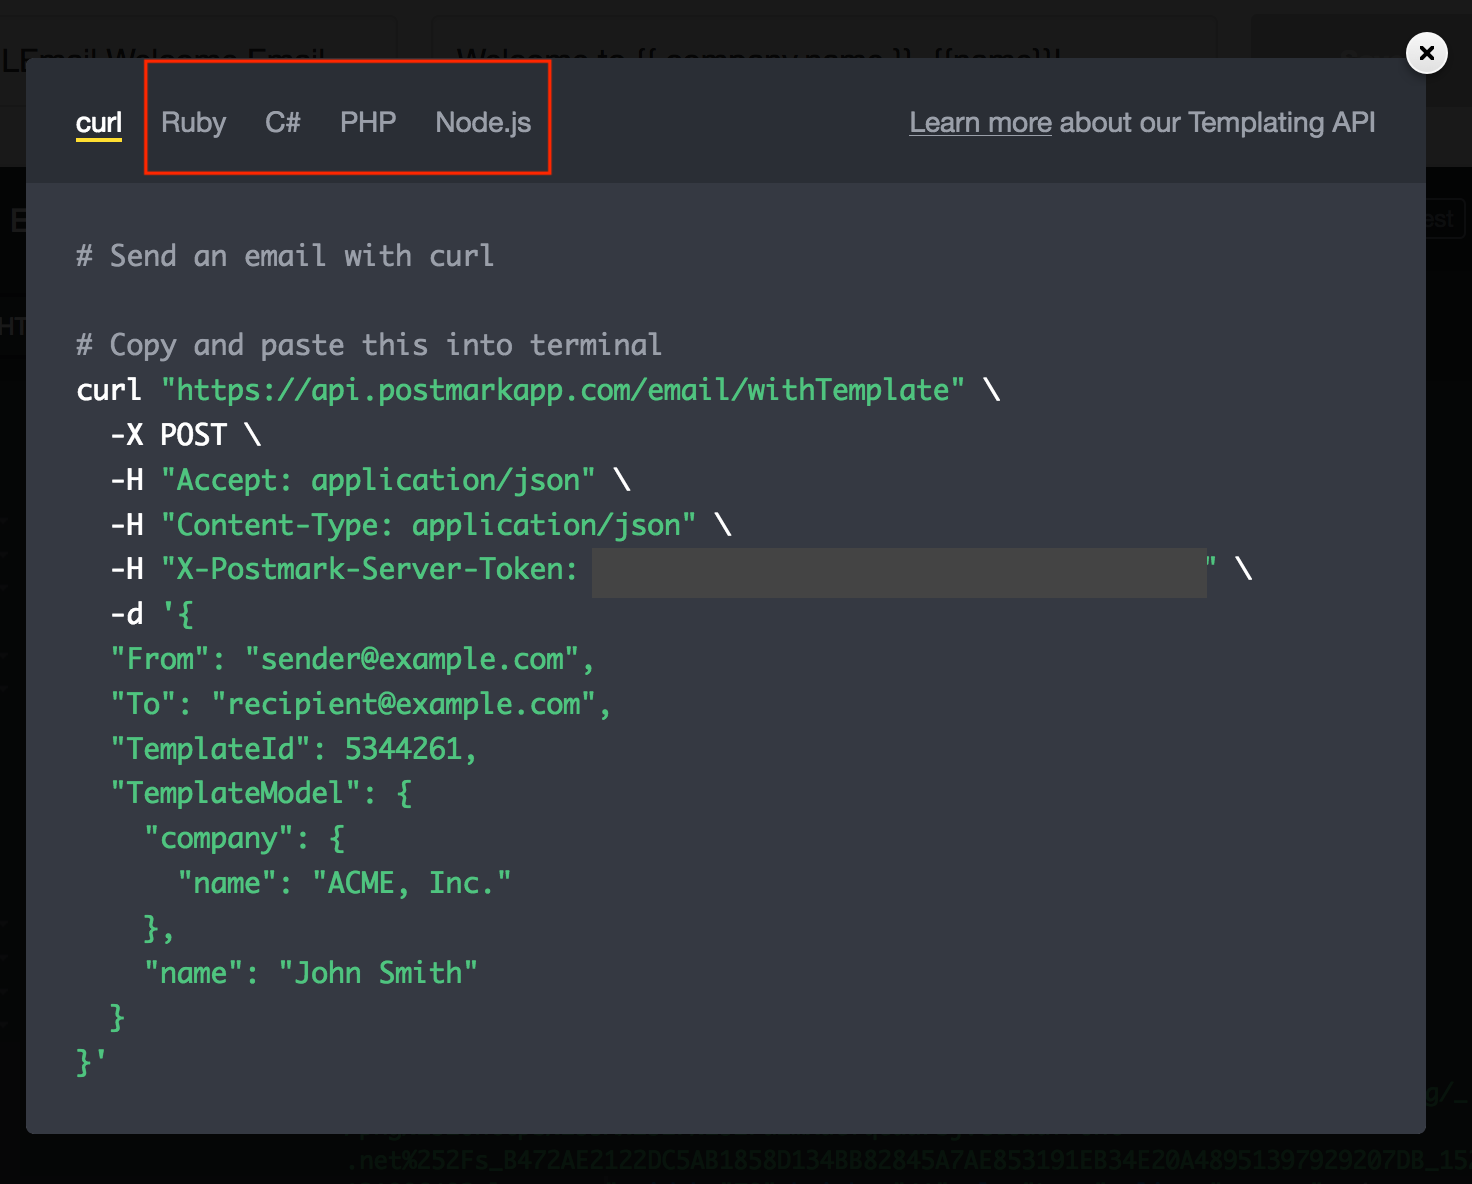
- Use a code snippet - Postmark also provides generated code snippets for sending using our Ruby, .NET, PHP, and Node.js official libraries. It is a good idea to test using a code snippet if you already are using one of our libraries or know which library you will end up using in production.
Use the Postmark UI
From the right side of the editor, click Edit Test Variables and enter in some data for the Mustachio variables. You will see the variable changes reflected in the Preview of your template.
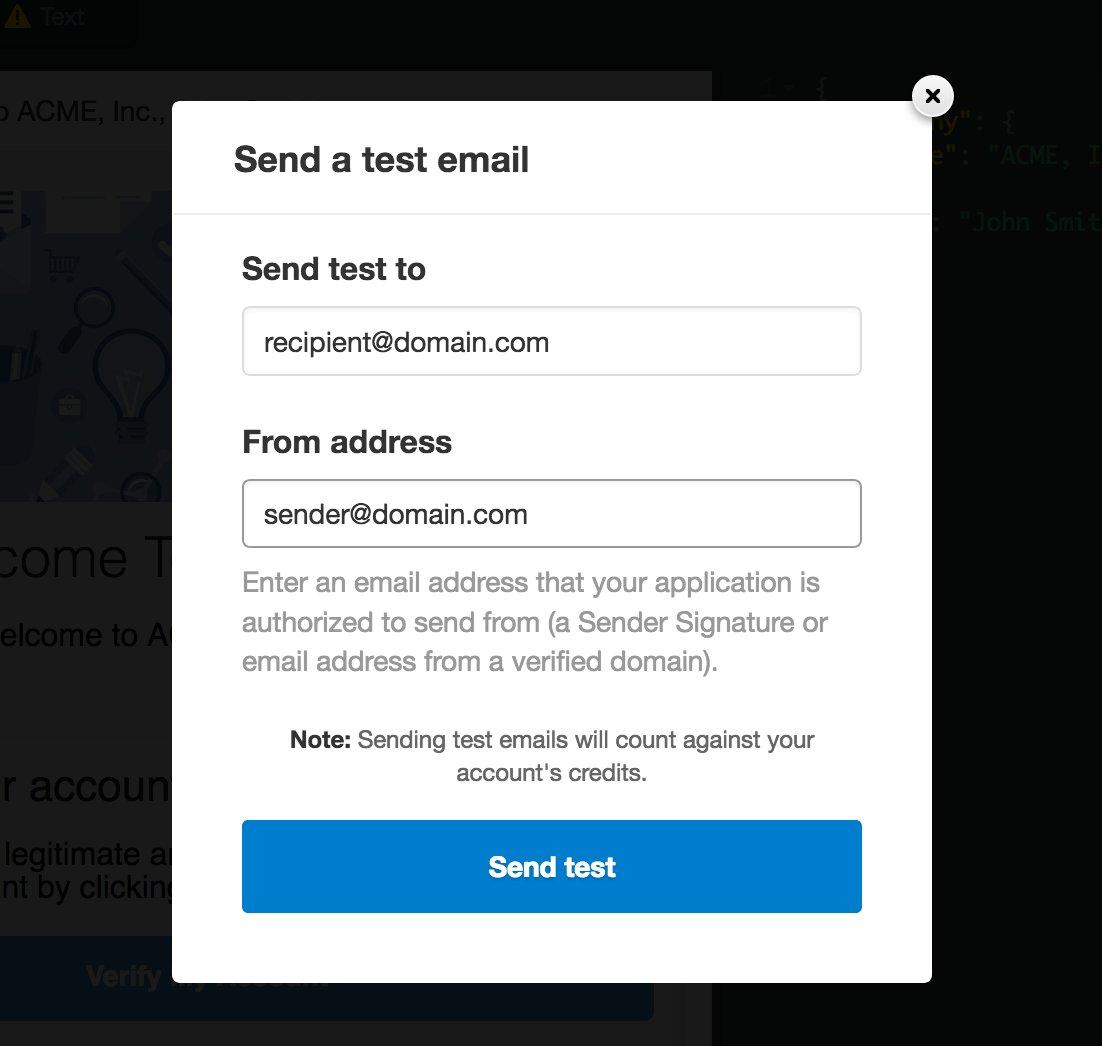
From the template’s edit page, click Send Test. Enter in a recipient address, along with a from address that is a valid sender signature, and a test will be sent using that template.
Use a curl Command in Terminal/Command Prompt
Click API Snippets in the editor.
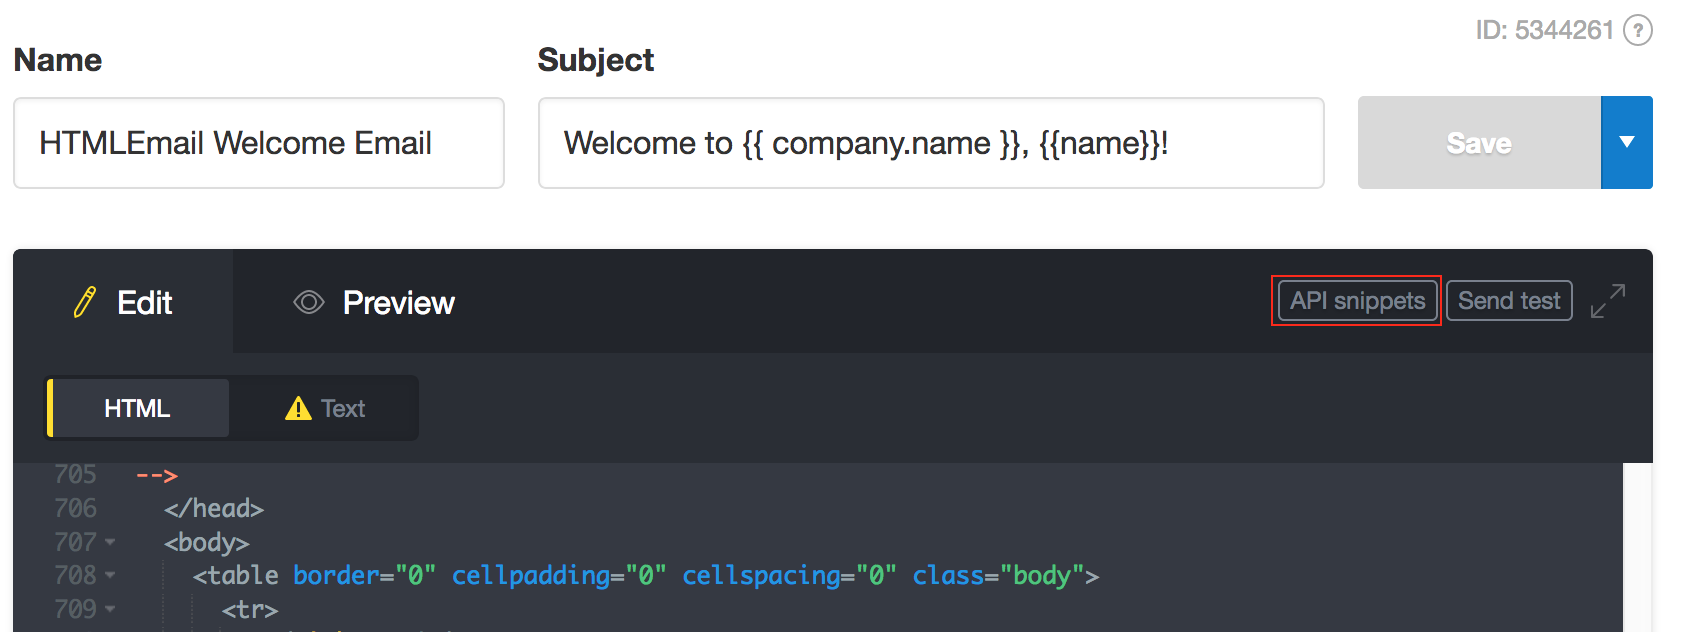
This will bring up example snippets for sending with the template using a curl command or some of our official libraries.
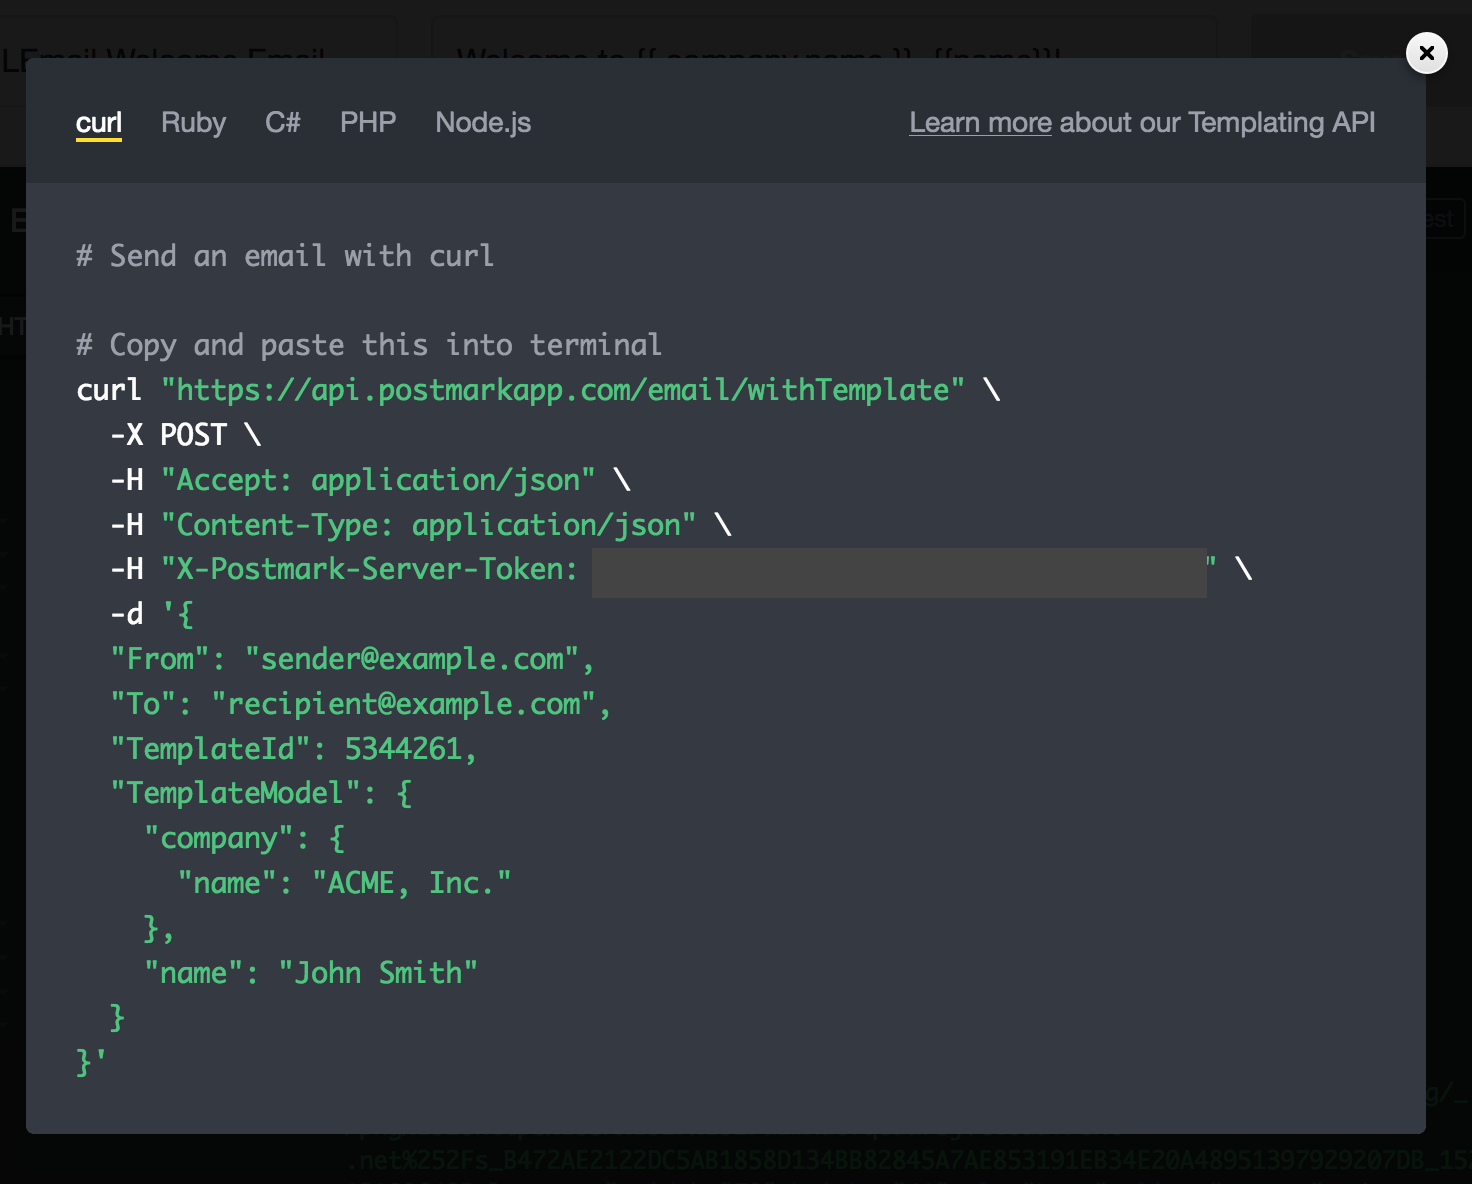
Copy the curl command shown and paste it into a terminal. The command will be populated with any data you entered when editing your test variables but be sure to update the “From” and “To” fields with appropriate email addresses for testing.
Grab a code snippet
From the API Snippets area, you can also grab code examples for sending with the template using our Ruby gem, C# library, PHP library, and Node.js library. Click the appropriate link from the navigation header to select which library you want to get a code snippet for.
Get help from Postmark Support
If you run into any issues getting your template set up and successfully being used for sending, reach out to us so we can help! You can use our contact form, email us at support@postmarkapp.com, use live chat directly from our site, or tweet us @postmarkapp.
Go live
Once you are satisfied with your tests, integrate Postmark into your app and start sending! Postmark offers several official libraries and community libraries to make the integration process as painless as possible.

Download the HTML Email templates and start sending with Postmark today.
Further reading
Other email service template tutorials
Receive email design content like this to your inbox.
No spam. Just related email content.


